Animate AIAnimatePhoto

Animate Image

Replace CharacterAnimate Old PhotosAnimate Photo

AI Image

AI Image CombinerAI Photo Editor

AI Video

Text to VideoImage to VideoVideo to VideoReference to Video
UpgradeUnlock faster generation and more credits
AnimatePhoto

AI Photo Editor

My Creations

45 credits · provider cost $0.04 per image price source

ModelCreditsProvider price
FLUX.1 Kontext Pro45$0.04
Nano Banana Pro Edit110$0.15

0 credits available

Edited result

Your edited image will appear here after generation.

Upload a source and describe one clear change.

Continue your workflow

Turn the finished image into motion

After you edit photo with AI, use the result as a clean starting frame or open another focused video workflow.

A finished result made when you edit photo with AI, ready for Photo to Video

Photo to Video

Send the edited frame directly into the main animation workbench.

An image transformed into a motion clip

Image to Video

Create a short video from a prepared image and motion prompt.

An old portrait prepared for subtle animation

Animate Old Photos

Add restrained motion to restored portraits and family photos.

Portrait image ready to guide a character replacement

Replace Character

Use a character image to replace the visible subject in a source video.

Home/AI Photo Editor

Prompt-based image editing

Edit Photo with AI

Edit photo with AI by uploading a JPG, PNG, or WebP image and describing one change in 3 to 800 characters. The editor uses the uploaded image as its visual source and returns a PNG result for review. Select Animate this photo to save that result as the primary image in the existing Photo to Video draft while keeping its other saved settings.

See the real AI photo editing workspace

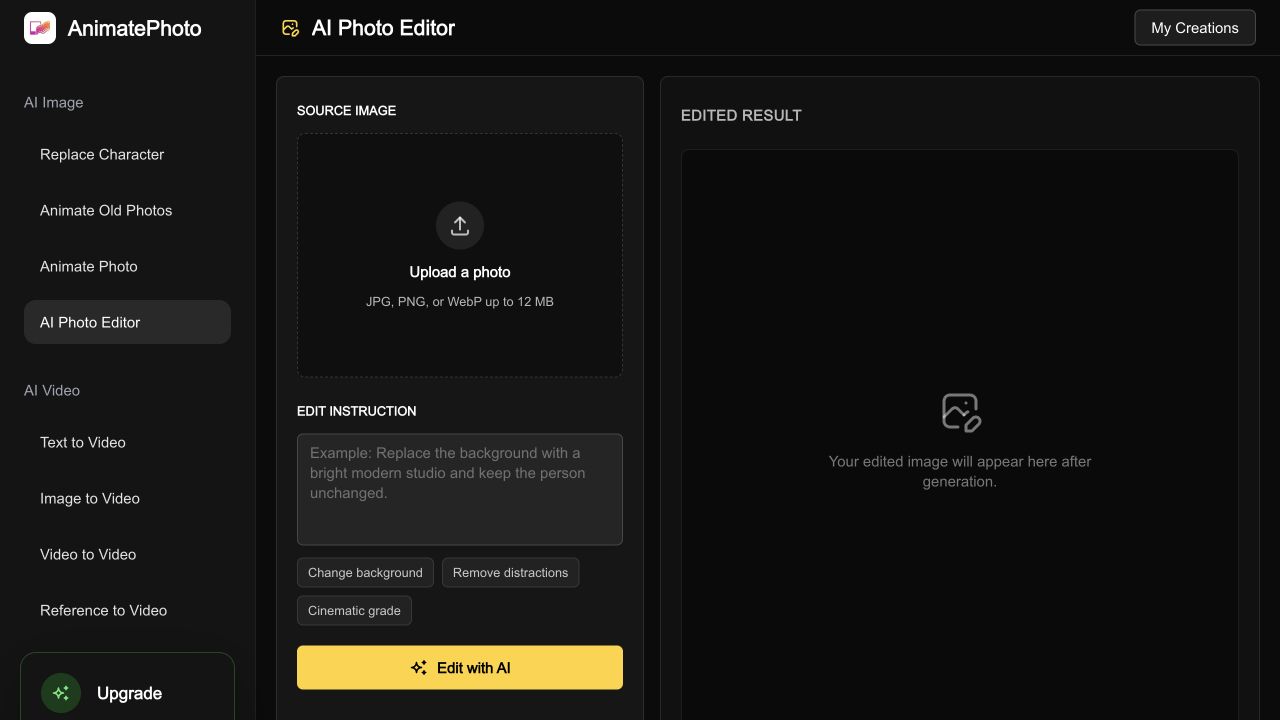
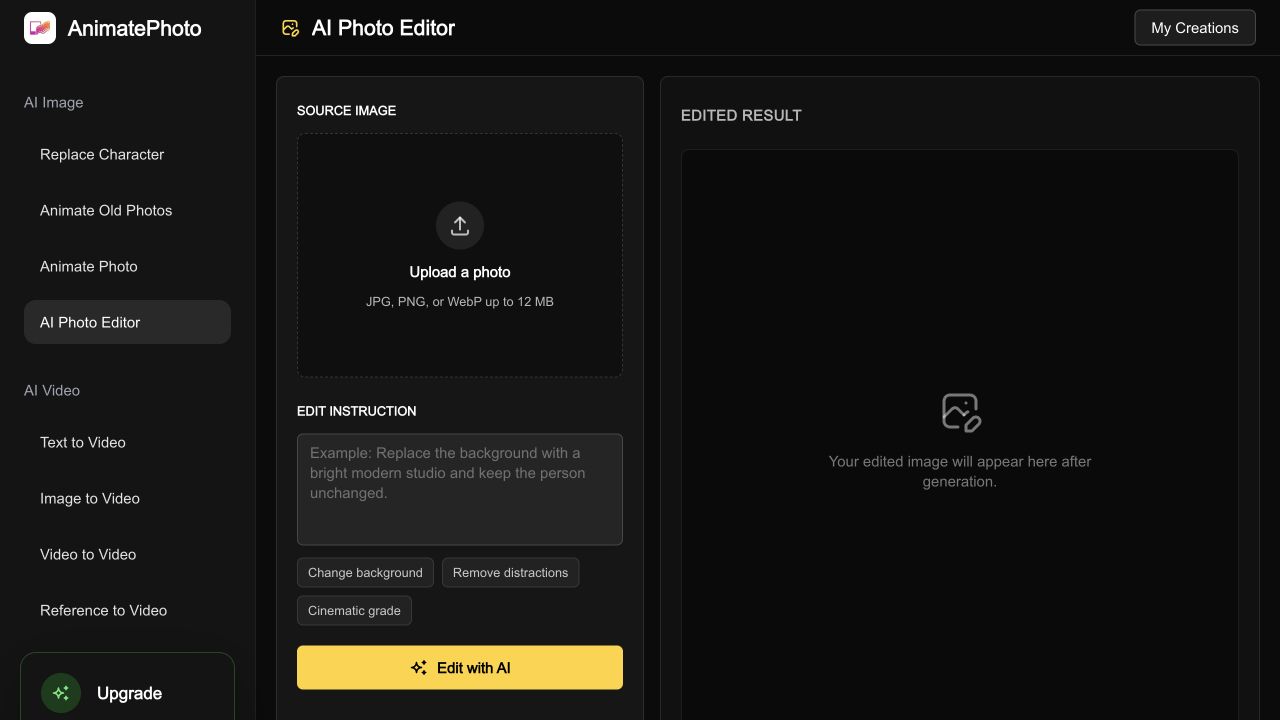
The Edit Photo with AI workspace keeps the source upload, edit instruction, and generated result in one place. After each edit, inspect the returned image, refine the instruction, download the PNG, or send it to Photo to Video.

Open the live editor
Edit photo with AI workspace with source upload, prompt controls, and result preview
The product screenshot shows the source upload, prompt controls, and result area. Generated images appear after a signed-in user runs an edit.

What you can change

Ways to edit photo with AI before video generation

Use these controls to edit photo with AI during the correction step between choosing a source and animating it. Each capability starts with your existing image and returns a complete edited frame that can be checked before video generation.

1

Change or simplify a background

Replace a busy room, street, or generic backdrop while asking the model to preserve the person, pose, wardrobe, and camera angle. A cleaner background gives a photo-to-video model fewer conflicting objects to deform when motion begins. Name the desired location, lighting direction, and realism level instead of asking for a vague improvement.

2

Remove distracting objects

Describe the unwanted object and where it appears, then ask the editor to rebuild the covered area naturally. This focused pass lets you edit photo with AI without redesigning the entire scene. It works best for small background distractions, stray text, simple props, or visual clutter. Review edges, hands, facial features, and repeated patterns before using the output as an animation frame.

3

Refine light, color, and atmosphere

Edit photo with AI to balance exposure, create a warmer time of day, soften harsh shadows, or apply a consistent cinematic grade. State which details must stay unchanged. Controlled lighting edits can make the subject easier to read and help the final video feel intentional without changing the composition.

4

Restyle while keeping the composition

Convert a photo toward editorial, illustration, film still, or polished portrait styling while retaining the major subject and framing. Style changes are generative, so identity and small text can drift. Use a narrow prompt, compare the result carefully, and make one meaningful change per pass.

Four-step workflow

How to edit photo with AI and animate the result

Use these four steps to edit photo with AI before motion generation. Finish the frame first, then let the video workbench focus on movement.

  1. 1

    Upload the best available source

    Choose a clear JPG, PNG, or WebP file under 12 MB. Use an image where the main subject is visible and important facial details are not hidden by blur, deep shadow, or heavy compression.

  2. 2

    Write one specific edit instruction

    State what should change and what must remain fixed. For example: replace the background with a daylight studio, but preserve the person, face, pose, clothing, crop, and camera angle.

  3. 3

    Review and refine the generated frame

    Inspect identity, hands, edges, text, lighting, and object continuity. If the change is too broad, rewrite the prompt with a smaller scope. New edits use the current result; select Return to source image to restart from the original upload.

  4. 4

    Send the image to Photo to Video

    Select Animate this photo. The editor saves the generated image as the primary asset in the existing Photo to Video draft, keeps its other saved settings, and opens Photo to Video ready for a motion prompt.

Verified inputs and outputs

AI photo editor specifications

These limits describe the current editor behavior, so each requirement can be checked before an image is uploaded or sent to video.

RequirementCurrent behavior
Source formatsJPG, PNG, or WebP
Maximum file size12 MB per source image
Edit instruction3 to 800 characters
Generated outputOne PNG image returned in match-input resolution mode
Repeated editsEach new edit uses the latest result until Return to source image is selected
Photo to Video handoffThe result replaces the draft's primary image while its other saved settings remain

Sign-in is required before an edit request is sent to the image model.

Common use cases

When to edit photo with AI before animation

The editor is most useful when a photo is close to ready but one visual problem could reduce video quality or make the generated motion feel inconsistent.

Creators cleaning a hero frame

Creators can edit photo with AI to remove background clutter, balance lighting, and export a cleaner portrait or product source for social video. The expected output is still a single frame, but it is easier to animate and less likely to pull attention toward unwanted details.

Families preparing old portraits

Use a scanned family photo with a clear face, reduce simple distractions, and improve atmosphere without asking the model to invent a new person. Then continue to Animate Old Photos or Photo to Video for restrained blinking, breathing, and camera movement.

Marketers creating scene variants

Marketers can edit photo with AI while keeping the subject and composition, then test a cleaner studio, seasonal setting, or more suitable color treatment. Generate one change at a time, choose the most credible frame, and animate that version for a short campaign asset.

Limits and quality checks

Check the edited frame before adding motion

When you edit photo with AI, the model interprets an instruction rather than moving exact pixels. It can produce strong corrections, but it may also alter details you wanted to keep. A short review protects the next stage of the workflow.

Protect identity explicitly

Include preserve the face, expression, pose, clothing, and camera angle when those details matter. Compare eyes, mouth shape, hairline, and distinctive accessories after every edit.

Use one major change per pass

To edit photo with AI reliably, request one major change per pass. A prompt that changes the background, outfit, pose, season, and art style at once gives the model too much freedom. Narrow instructions are easier to judge and revise.

Inspect text and small geometry

Logos, signs, fingers, jewelry, repeated patterns, and thin object edges can become distorted. Zoom in before downloading or transferring the result to video.

Keep a usable original

Return to source image resets the live editor to the original upload, and Download edited image saves the current PNG. Keep the original file outside the browser so you can restart if several edits introduce drift.

Questions

AI photo editing FAQ

Practical answers for people who edit photo with AI, from source images and prompts to iteration and the Photo to Video handoff.

What happens when I edit photo with AI?

When you edit photo with AI, the source image is sent with your instruction to an image-editing model. The output is generated from that visual source rather than from text alone, although generative changes can still modify fine details.

What image formats can I edit?

You can upload JPG, PNG, or WebP images up to 12 MB. Clear, well-exposed sources with a visible subject generally provide a more controllable result than heavily compressed, blurred, or extremely dark images.

Can I edit photo with AI more than once?

Yes. Change the instruction and select Edit with AI after the first result appears. The next request uses the current result; select Return to source image to restart from the original upload.

How is the edited image transferred to Photo to Video?

Selecting Animate this photo saves the generated image as the primary asset in the existing Photo to Video draft. The editor keeps the draft's other saved settings and opens Photo to Video ready for a motion prompt.

Will an AI edit preserve every detail exactly?

No. The model aims to follow the source and prompt, but faces, hands, text, patterns, and small accessories can drift. Review the full frame and use a narrower prompt when exact preservation is important.

Edit the frame, then move straight into animation

Use this workflow to edit photo with AI, make one controlled correction, and send the approved result into your existing Photo to Video draft.

Edit photo with AI

Last updated: August 18, 2026